
After all the meat processing has been complete and I have
stored the remaining bones in the freezer, the time after big game season and
before turkey season is a great time to make this part of your annual wild game
schedule. These broths can be used for
roasts and soups all year if you process enough.
Making the broth is an easy series of tasks that take a long
time but are mostly low in intensity. It is easy to do this while doing other things
like planning future hunts, logging game camera photos, maintaining hunting
gear, reading a hunting book or doing other things (chores).
First, pull out about 4 to 5 lbs. of bones you will be using
to make your broth, you can use more or less but I have been using this amount
with about 2 ½ to 3 spring gallons of water.
I use bottled spring water because I am on a city water system and
prefer water for this that is not chlorinated.
Choose your bone amount based on the pot size you have, an
approximate 60/40 ratio of bone pound to gallons of water seems to work but
there isn’t really a wrong answer.
Thaw the bones if they are frozen and then place them on a
pan to catch drippings from the meat and bone. Leave on meat, tendon and sinew,
these add flavor, healthy fats, minerals and enzymes.

 Put the pan in an oven
that is preheated to 400 degrees for about 45 minutes.
Put the pan in an oven
that is preheated to 400 degrees for about 45 minutes.
The house will smell like roast is cooking, so make sure you have something to satisfy your taste buds when you begin to salivate.

 Put the pan in an oven
that is preheated to 400 degrees for about 45 minutes.
Put the pan in an oven
that is preheated to 400 degrees for about 45 minutes.The house will smell like roast is cooking, so make sure you have something to satisfy your taste buds when you begin to salivate.
After the 45 minutes are up, pull the bones from the oven
and let them cool enough to handle them.
When you can grab them, use a tool to break them up to expose the bone
marrow.
This allows the broth to slow cook and absorb all the fat and minerals from inside the bone. I use a pair of vice grips and break them open.
This allows the broth to slow cook and absorb all the fat and minerals from inside the bone. I use a pair of vice grips and break them open.
 |
| Bone Marrow Exposed to Liquid |
BASIC INGREDIENTS
4 to 5 pounds of roasted bone with meat scraps, tendon and sinew
2 to 3 gallons of spring water
1 onion (skin, scraps in good shape)
2 to 4 green onions
3 to 5 cloves of crushed garlic
¼ to ½ cup carrot pieces (saved ends, scraps are fine)
1 to 3 cut up celery sticks with or without leaves
2 teaspoons of cayenne pepper
2 teaspoons of chili powder
2 teaspoons of black pepper
1 or 2 bay leaves
1 to 3 thin slices of ginger root
2 to 4 tablespoons of apple cider vinegar

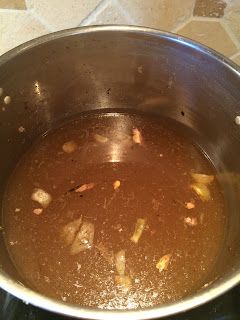
After this lengthy slow simmer, you will notice the amount
of liquid has been reduced by a few inches.
I then turn of the heat and use some tongs to remove all the bones, bone
bits and veggies.
 The liquid is then
cooled overnight, by placing it back on the back porch if it is above freezing
but below 45, but this time covered tightly with a lid and plastic wrap. If
it is to warm or to cold, I will take up space in the fridge. By morning, all
the fat will have risen to the top and can mostly be skimmed off. Small particles of fat you cannot removed can be strained through a sanitized cheese cloth.
The liquid is then
cooled overnight, by placing it back on the back porch if it is above freezing
but below 45, but this time covered tightly with a lid and plastic wrap. If
it is to warm or to cold, I will take up space in the fridge. By morning, all
the fat will have risen to the top and can mostly be skimmed off. Small particles of fat you cannot removed can be strained through a sanitized cheese cloth.
 I sanitize the cheese cloth by
submerging it in boiling water in a small sauce pan, keep this water close to
boiling to continue sanitizing the filtering cheese cloth.
I sanitize the cheese cloth by
submerging it in boiling water in a small sauce pan, keep this water close to
boiling to continue sanitizing the filtering cheese cloth.
The cheese cloth will become clogged with fat and filter the broth slowly. When this happens, stop, rinse the cheese cloth and dunk it in that boiling water again (it is also good to keep track of the top and bottom for better filtering).
When you have filtered the liquid, you have created the broth and now it is preservation time through canning or freezing.


 I sanitize the cheese cloth by
submerging it in boiling water in a small sauce pan, keep this water close to
boiling to continue sanitizing the filtering cheese cloth.
I sanitize the cheese cloth by
submerging it in boiling water in a small sauce pan, keep this water close to
boiling to continue sanitizing the filtering cheese cloth. The cheese cloth will become clogged with fat and filter the broth slowly. When this happens, stop, rinse the cheese cloth and dunk it in that boiling water again (it is also good to keep track of the top and bottom for better filtering).
When you have filtered the liquid, you have created the broth and now it is preservation time through canning or freezing.
Comments
Post a Comment